
Magento Translation Manager: Documentation
The Magento Translation Manager is an extension for the professional management of translations of product data and CMS content in Magento online stores. Translatable contents can be selected and exported as XML file as well as later be imported as XML files again. The XML export format is a translation-friendly format that is translatable with any translation tool (e.g. Across, memoQ, SDL Passolo, SDL Trados Studio). After the translation the target files can be imported into Magento again. All available translation data are automatically saved in the correct place - no more manual copying.
Installation
To install the Magento Translation Manager, proceed as follows:
- Select the menu item System > Magento connect > Magento Connect Manager.
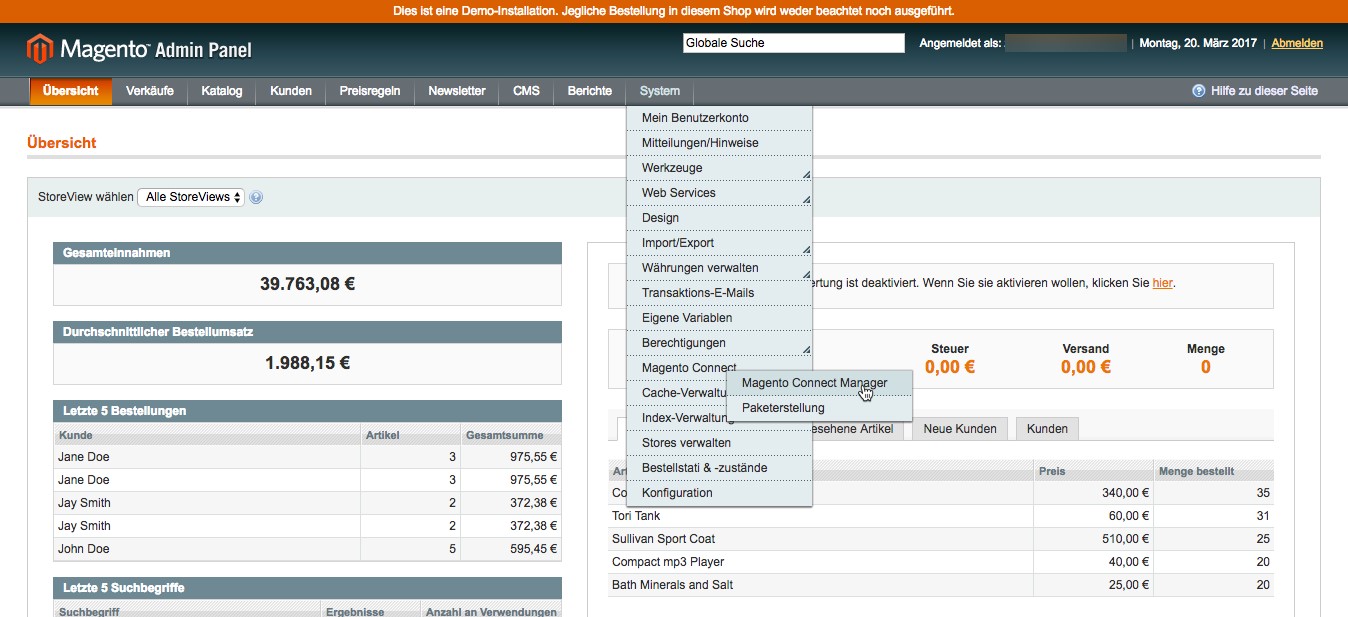
- Enter your user name and password.

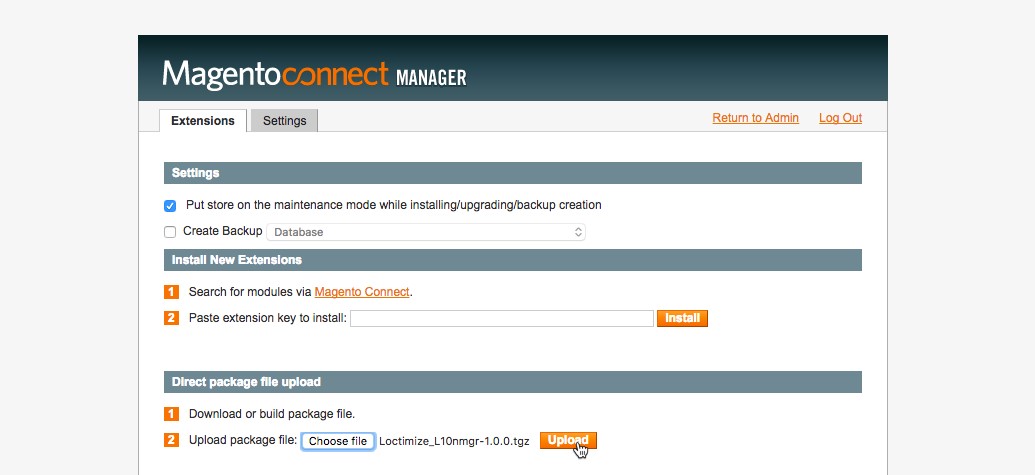
- Go to the section Direct package file upload in the Magento Connect Manager.
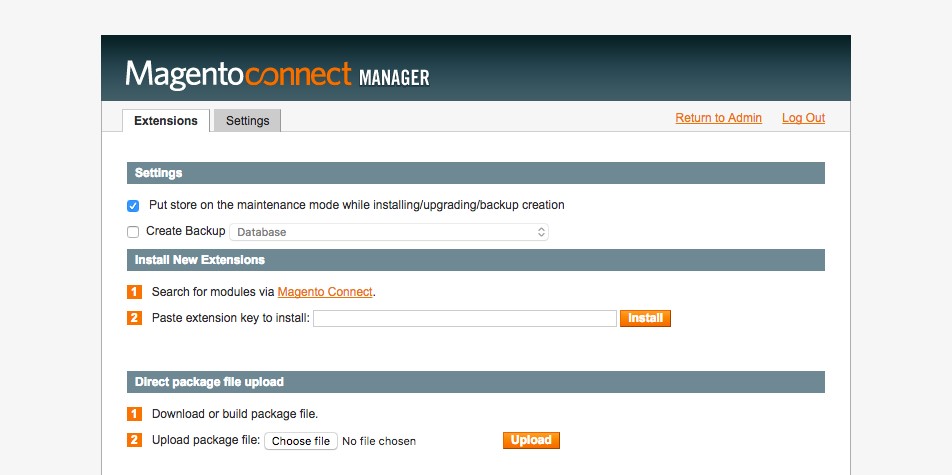
- Click Choose file and then choose the installation package (Loctimize_L10nmgr-1.0.0.tgz).
- Start the installation by clicking on Upload.
- After the upload the Loctimize_L10nmgr will be listed at the end of the list of installed extensions.

- After the installation, you can exit the Magento Connect Manager and return to the admin area to continue setting up the Translation Manager.

Getting started: Features overview
After the installation you will find the functions of the Translation Manager in the main menu in the menu section Translation Manager. In the menu you have access to the following functions:
- Export: This menu item gives you the option to export texts from Magento into XML for translation. For this purpose you can create several export profiles. You can translate products, product attributes, categories, tags, CMS pages and CMS blocks. The XML files can be downloaded as a ZIP file or can be directly uploaded to an FTP server.
- Import: This menu item gives you the option to import translated XML files into Magento. You can upload a single or multiple XML files in a ZIP file.
- Manage StoreViews: This menu item gives you the option to manage StoreViews in Magento, i.e. to create new or edit existing StoreViews. StoreViews are equivalent to languages in Magento. This means: You have to create a new StoreView for every language into which a store should be translated.
- Logs: This menu item gives you the option to view the exports and import logs and download them.
- Help: This menu item gives you the option to access the online help.
Under the menu item System > Permissions > Roles you can give an user group access to the Translation Manager and its individual functions.
Giving access to an user group in the Translation Manager
To give an user group access to the Translation Manager, proceed as follows:
- Click System > Permissions > Roles in the Magento admin area.
- Select an existing role or add a new one.
- Click Role Resources on the left side of the menu and then select Custom from the list. You can give a group access to individual or all modules of the Translation Manager.
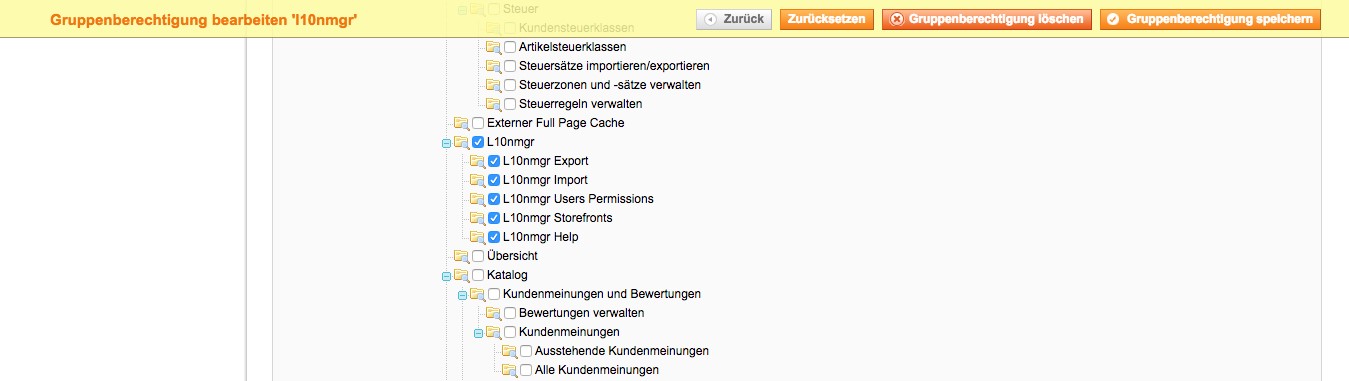
- Save the group roles by clicking Save Role at the upper right corner of the menu.
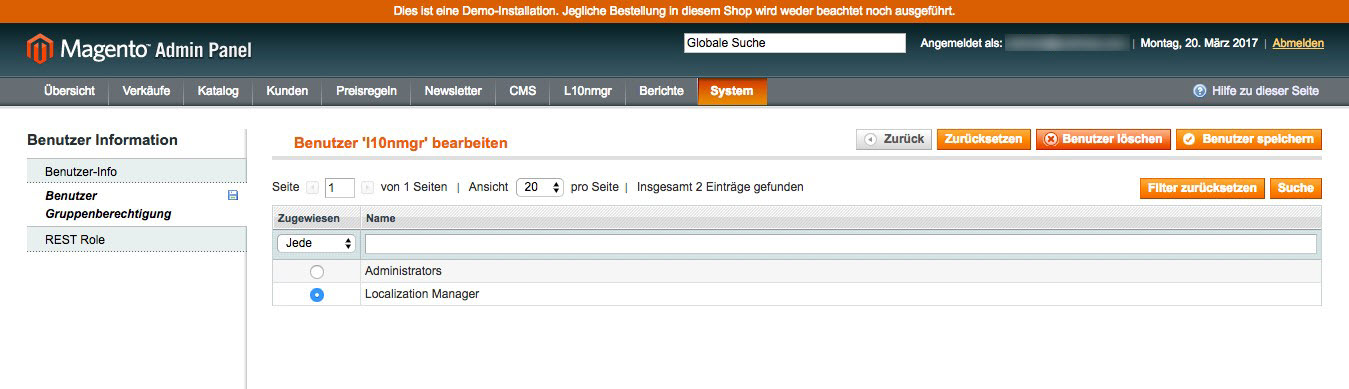
Then assign the new or changed user roles to a user using the menu items System > Permissions > User.
Exporting texts for translation
To export texts for translation the following steps are required:
- Adding an export profile
- Selecting an export profile and starting the export
- Downloading XML files
Adding an export profile
The export profile contains all required export settings. These include general profile information, logs, file export options and filter settings.
To add an export profile, proceed as follows:
- Click on the menu item Translation Manager > Export in the main menu.
- You will be taken to the export profile manager, which displays a list of existing export profiles.
- Click Add Export Profile on the upper right corner of the menu to add a new export profile.
Entering the profile information
- Profile name: Enter a profile name that describes the purpose of the export profile. E.G. Products en-US > de-DE to export all products for a translation from English into German.
- Profile status: Enabled
- Exported data types: Select what kind of content you want to translate from the list. You can choose between products, product attributes, categories, tags, CMS pages and CMS blocks.
- Source language (Source StoreView): Select the language from which you want to translate from the drop-down list.
- Target language (Destination StoreView): Select one or more languages into which you want to translate from the drop-down list.
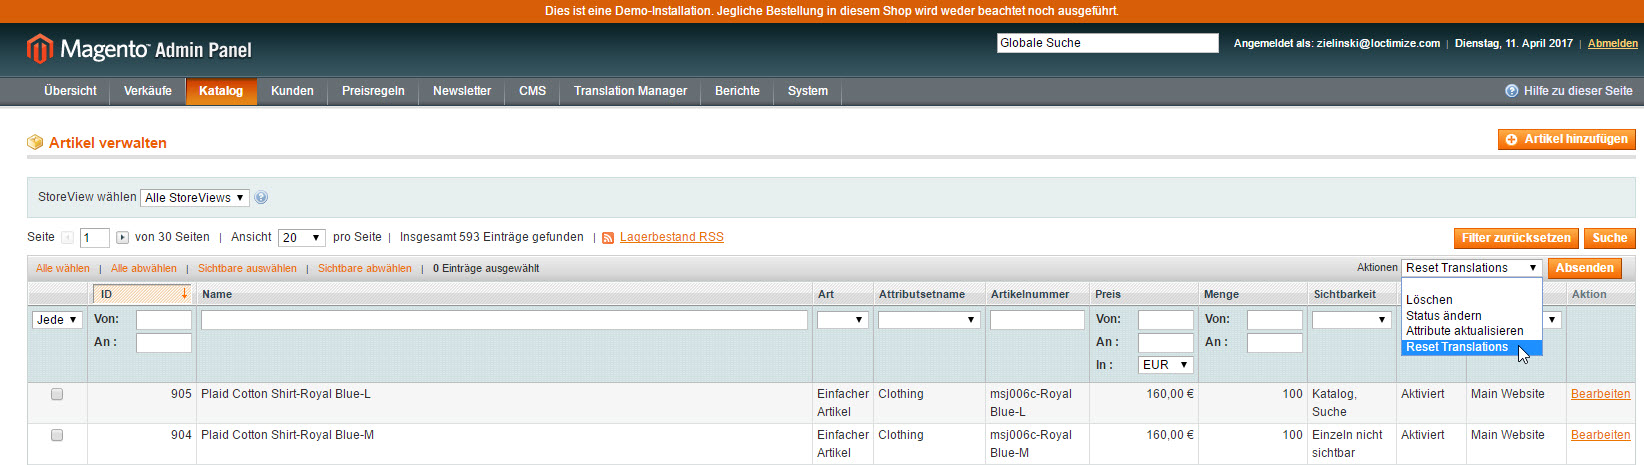
- Export mode: Select if you want to export all items or just export not translated items only from the drop-down list. You can reset translations before export in order to make sure that all content will be exported. To do so, click on Rest Translations on the right hand side in the particular area. Then click on Send.
- File prefix: Insert the prefix of the export file in the text box. The file naming convention for export files is: FILEPREFIX_SOURCELANGUAGE_TARGETLANGUAGE_YYYYMMDD_HHMMSS. XML ¦ ZIP
- Logging options: Select what kind of information should be saved in the log from the drop-down list. You can choose between successful updates (saves all tasks in the log), warnings, and errors.
Filling out the file options form
- Server Type: Select None (local server), FTP or FTPS from the drop-down list.
- Host: Specify the URL or IP address of the FTP or FTPS server.
- Port: Specify the port of the FTP or FTPS server. The default value is port 21 (FTP).
- User name: Enter the username of the FTP or FTPS server.
- Password: Enter the password of the FTP or FTPS server.
- Path (Folder): Specify in which folder on the FTP or FTPS server the export files should be saved.
- Compression: Specify if the export files should be compressed with ZIP.
Export conditions (only for products)
To export specific products for translation, you can set filters in Export Conditions.
- Click Export Conditions on the menu on the left to open the filter editor.
- By Clicking on ALL you can select whether all or any of these conditions must be met.
- Then click ... and select from the drop-down menu whether the conditions should be TRUE or FALSE.
- Via click on the green plus symbol you can then add filter conditions.
- After entering all necessary information, click Save on the top right side of the menu to save the changes. You are returned to the export profile list.
You can now proceed with the export of the contents.
Selecting an export profile and starting the export
To start the export, proceed as follows:
- Select in the main menu under Translation Manager > Export an export profile from the list.
- Then click the link Run on the right hand of the action column to start the export. During the export process the export status will be shown in form of a progress bar.
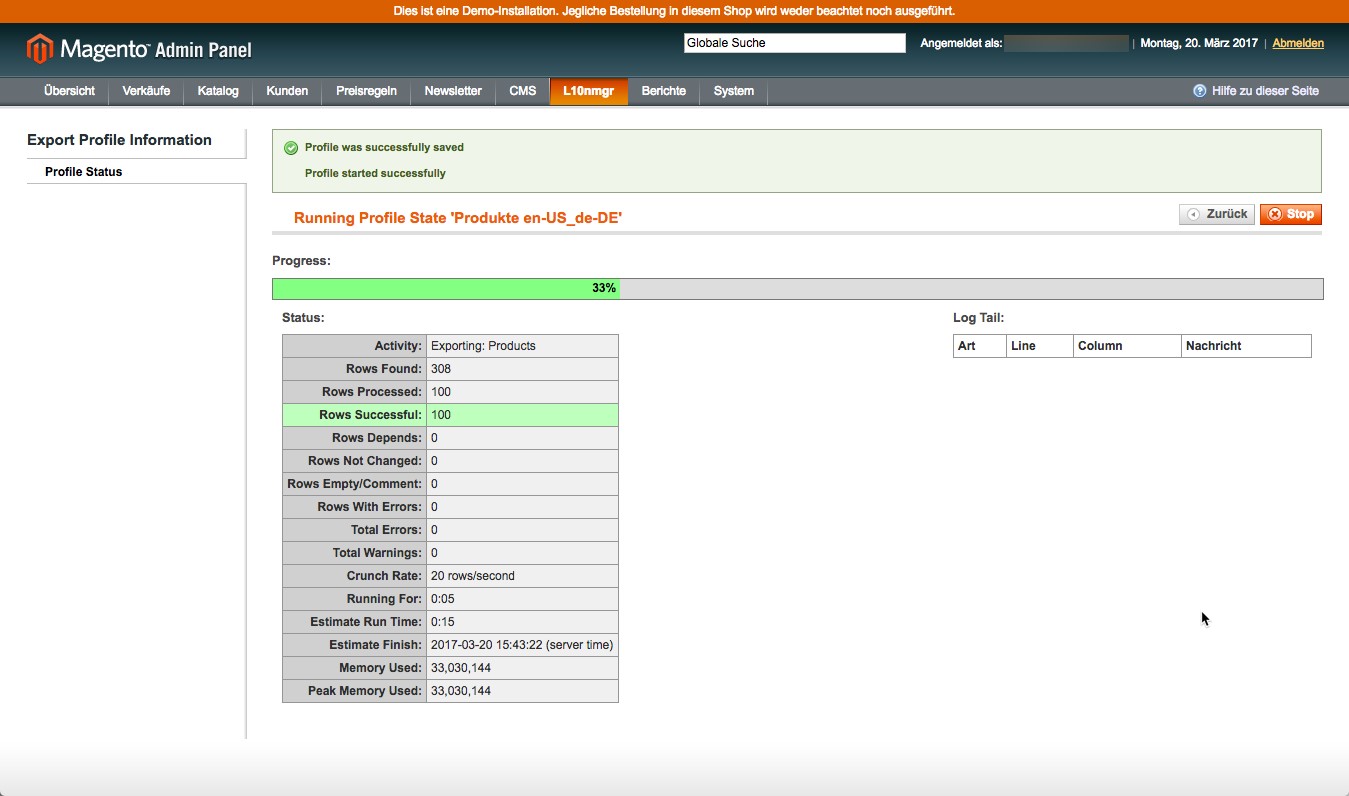
On completion of the export you are automatically returned to the profile information.
- You can request the export results and the log in the menu on the left side under profile status.
Depending on the profile type the export files will be saved on a local server or a remote FTP or FTPS server.
Downloading XML files
To download the exported XML files for translation, proceed as follows:
- Select Translation Manager > Export in the main menu.
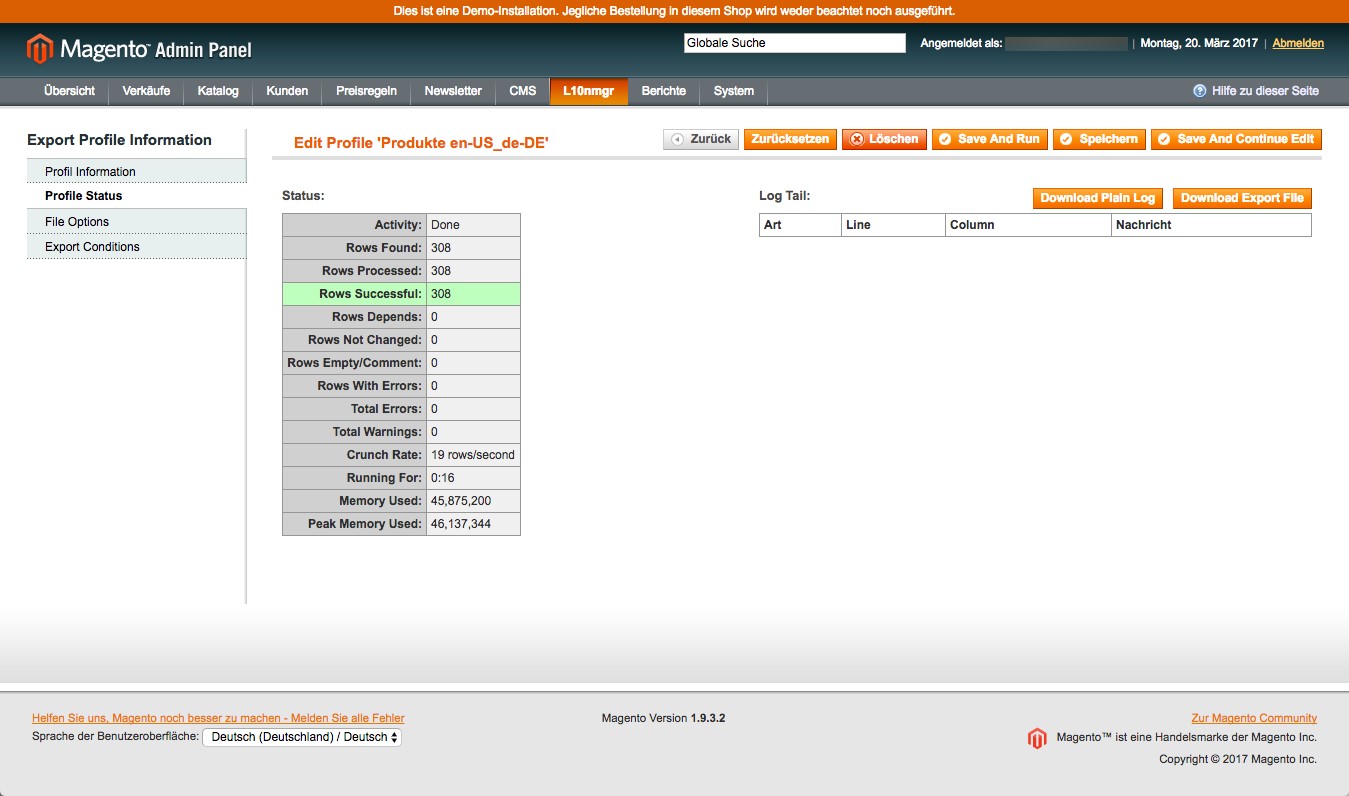
- Click on the name of the export profile in the list. The export profile is opened for editing.
- Click Profile Status on the left side of the menu. Here the results of the last export are displayed.
- Click Download Export File in the upper-right corner of the menu to export the XML files.

- Additionally, you can also download and save the last log by clicking Download Plain Log. The format of the log is CSV which can be opened with e.g. Microsoft Excel.
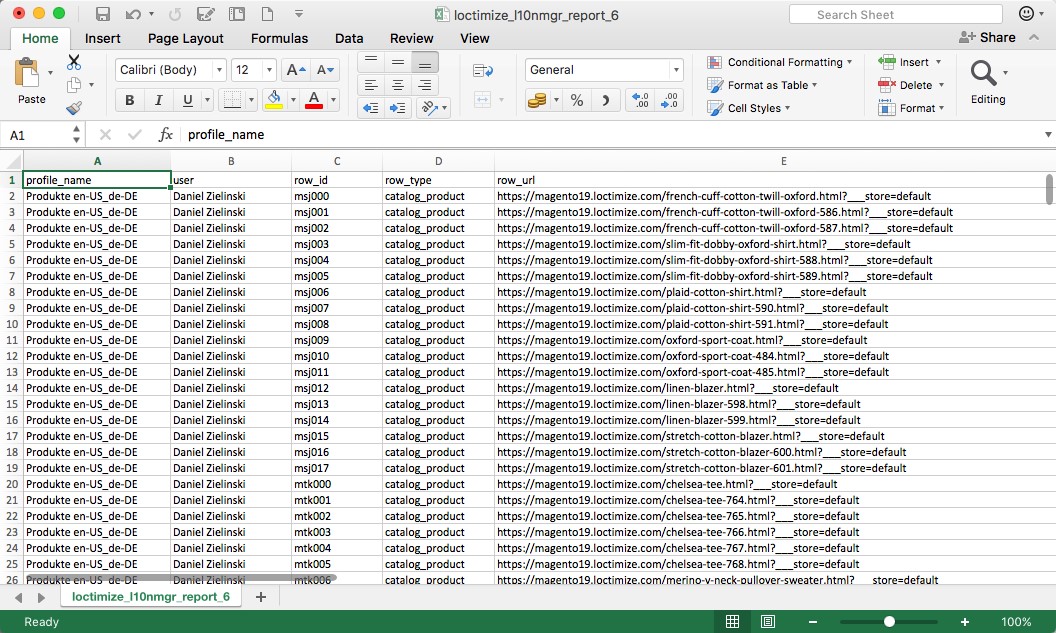
The export log contains information about the used export profile, the name of the user who has made the export, the ID of the data record, the type of content as well as a link to the product page. Note: The links can only be accessed in the browser, if the products are set to visible. For products whose visibility is set to "Individually not visible” no preview can be displayed.

Translating XML files
Structure and properties of the XML format
The exported XML file consists of the root element <magento_l10n>, the <header> area and the <body> area that contains the translatable content (products, product attributes, tags, categories, CMS pages or CMS blocks). The header contains the following not translatable meta information:
- <sourceStoreViewId>: ID of the source language StoreView
- <sourceLanguageIso>: ISO language code of the source language
- <targetStoreViewId>: ID of the target language StoreView
- <targetLanguageIso>: ISO language code of the target language
- <sourceStoreViewUrl>: link to the StoreView
- <exportTimeStamp>: Time stamp of the export
- <wordCount>: approximate number of exported words
- <productCount> / <wordCount> / <tagCount> / <categoryCount> / <pageCount> / <blockCount>: Number of exported contents
All exported products, product attributes, tags, categories, CMS pages or CMS blocks are represented by a single element and have an ID or identifier. Under certain circumstances it is possible to display the contents as CDATA, if they are not XML compliant. All elements, that contain the attribute translate="no" must be excluded from the translation.
Settings files
The exported XML files have a localization-friendly format and are supported by any translation tool. You can receive the settings file for the translation tool SDL Trados Studio from us. Upon request we also provide settings files for Memsource, memoQ, across, Wordfast, etc.
Importing translations
To import the translated XML files, proceed as follows:
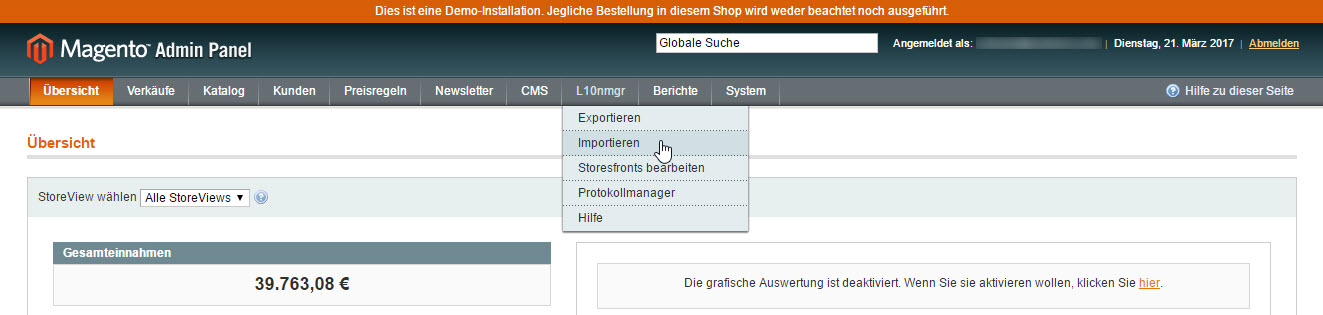
- In the main menu click on the menu item Translation Manager > Import.
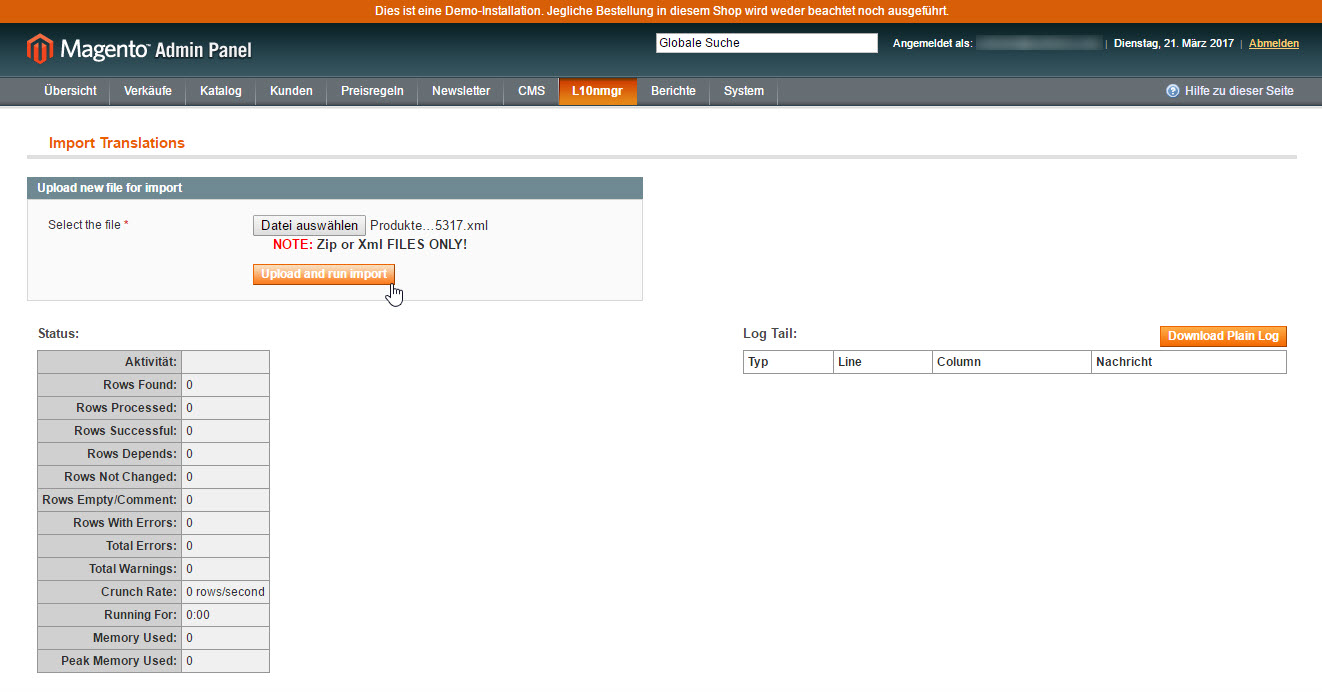
- Select the translated XML which you want to import. You can also import multiple translated XML files in form of a ZIP file.
- Click Upload and run import to start the import of the translated file.
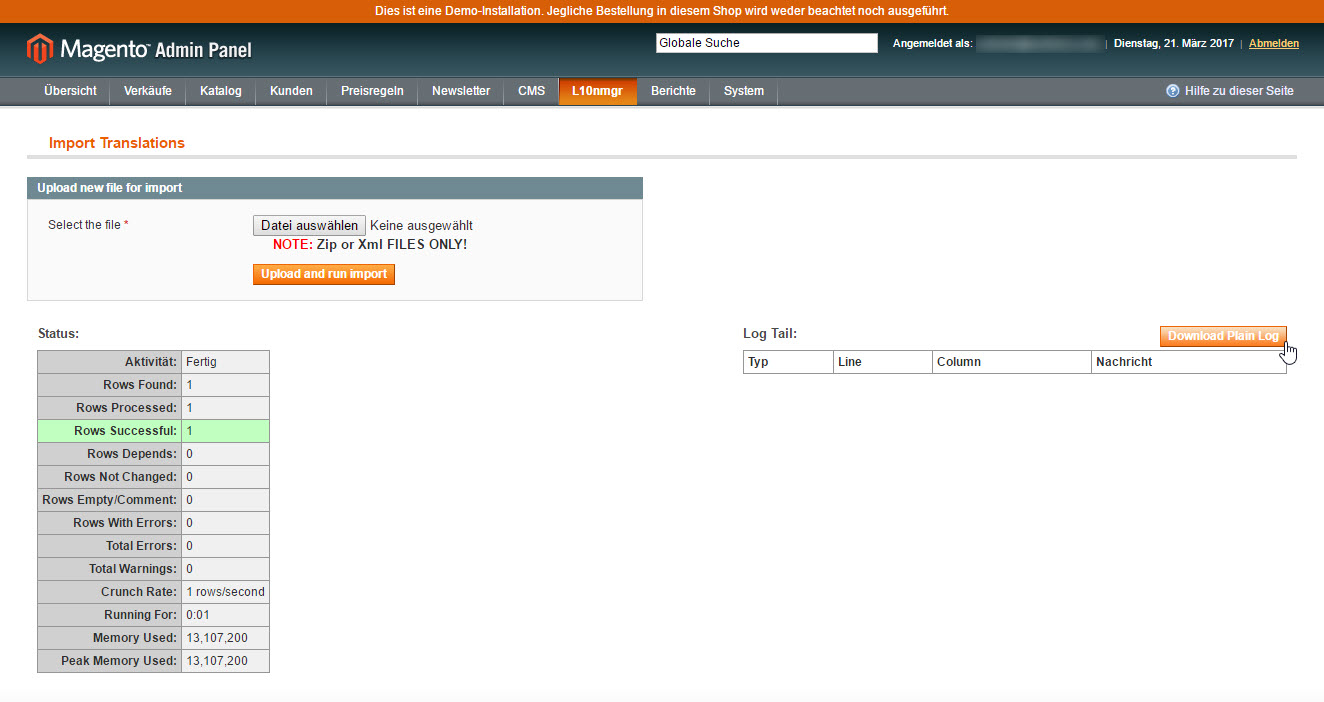
- The import results are displayed to you on the status display on the left side.
- You can download a log via the button Download Plain Log and then save it to your local workstation. The format of the log is CSV which can be opened with e.g. Microsoft Excel.
Managing StoreViews (creating new languages in the store)
Content languages are managed as StoreViews in Magento. This means that a separate StoreView is required for every language that you want to translate into.
To create a new language for translation, proceed as follows:
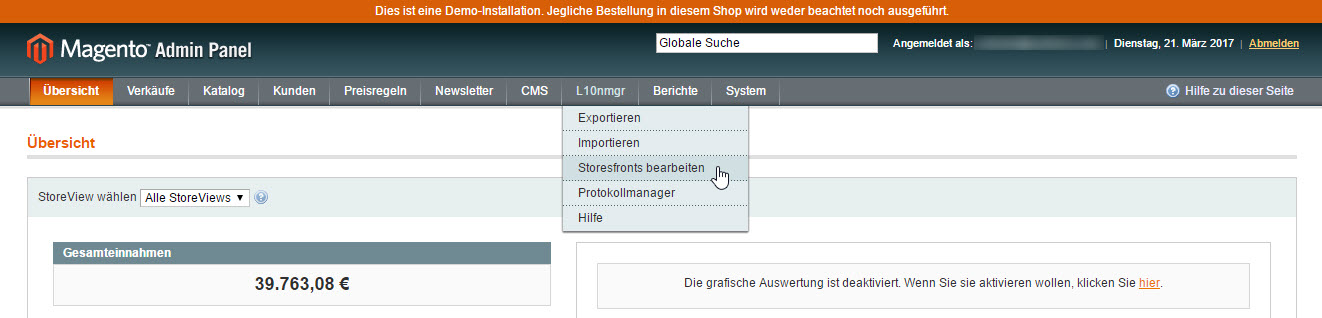
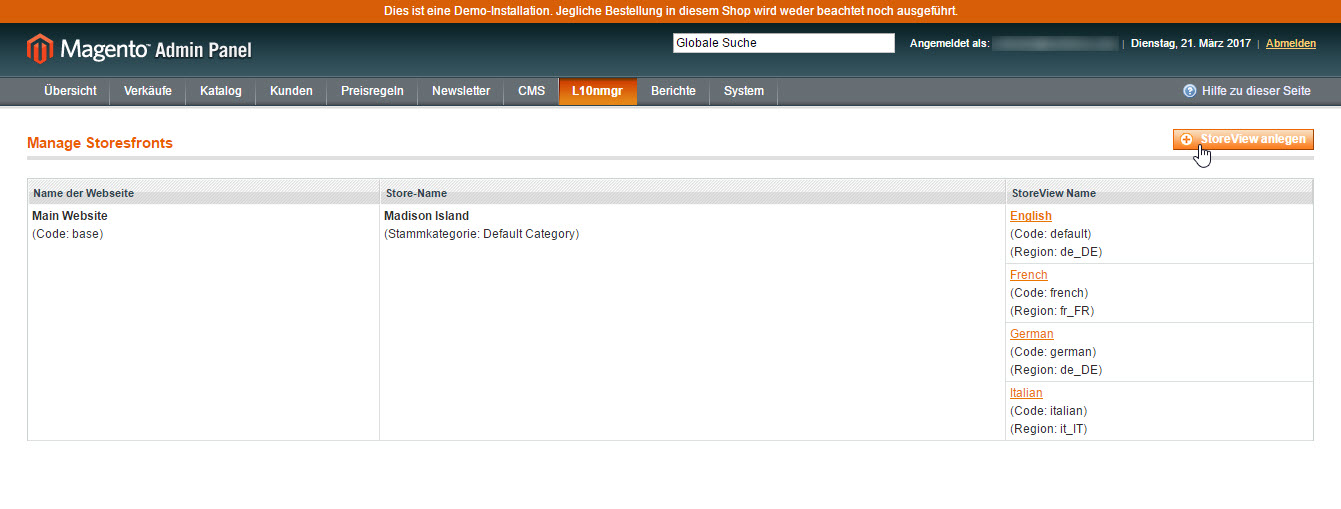
- In the main menu click on the menu item Translation Manager > Manage StoreViews. You will be taken to the StoreView manager, which displays a list of existing StoreViews.
- Click the Create StoreView button on the upper right side to create a new language.
Entering the StoreView information:
- Store: Select the store that should be assigned to the new StoreView from the drop-down list.
- Name: Enter the new StoreView name.
- Code: Enter the language of the StoreViews.
- Locale: Select a language and a region from the drop-down list.
- Status: Enabled
- Allowed users: List all users who are intended to receive access to these StoreView.
- Sort Order: Specify on which position on the list the StoreView should be shown.
Save the new StoreView by clicking the button Save StoreView.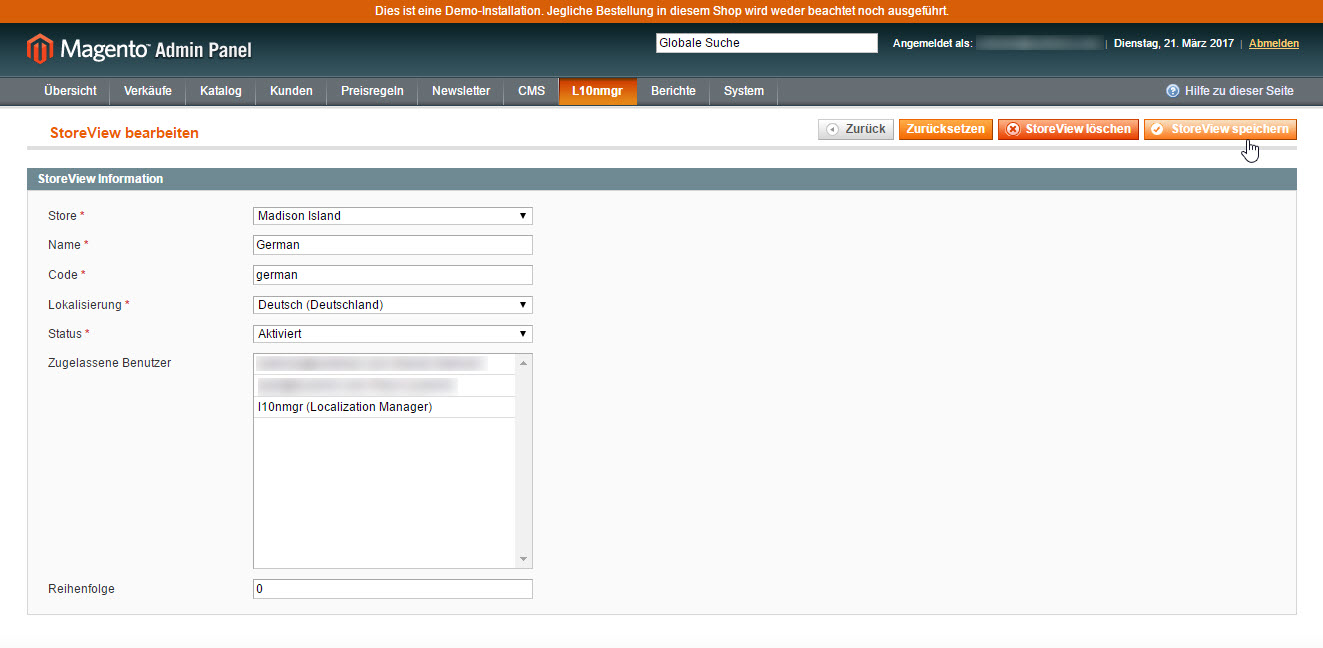
Checking logs
To view and download export and import logs, proceed as follows:
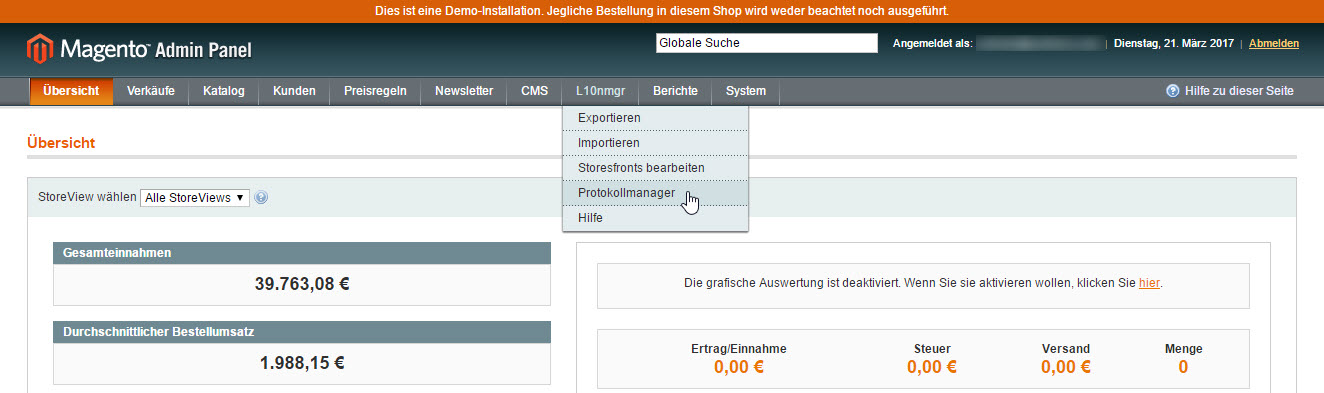
- Click on the menu item Translation Manager > Logs in the main menu. You will now be taken to the logs manager, where a list of existing StoreViews is displayed.
- If you want to view a log, click the Download button in order to save the log on your local workstation. The format of the log is CSV which can be opened with e.g. Microsoft Excel.
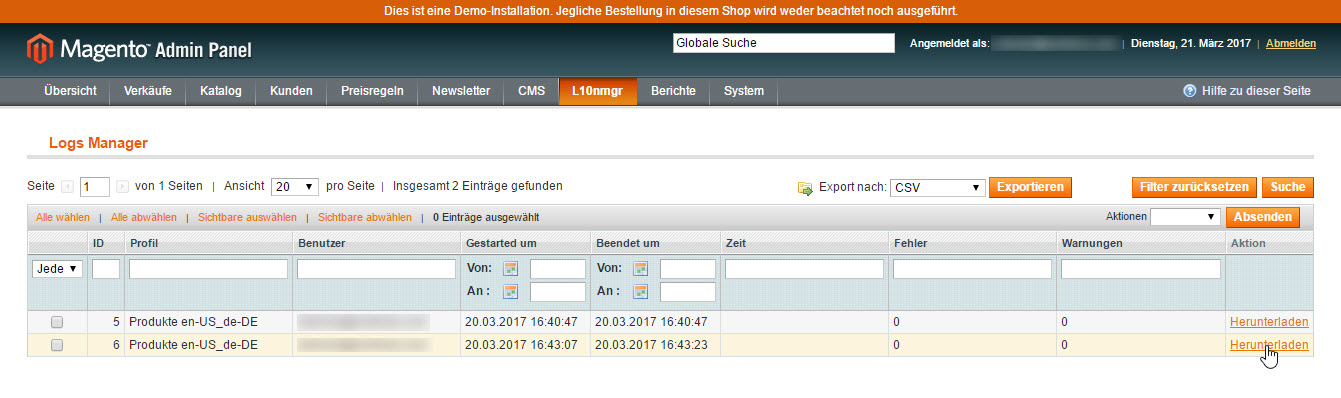
- Alternatively, you can select the log and download it as CSV or XML using the Export button.
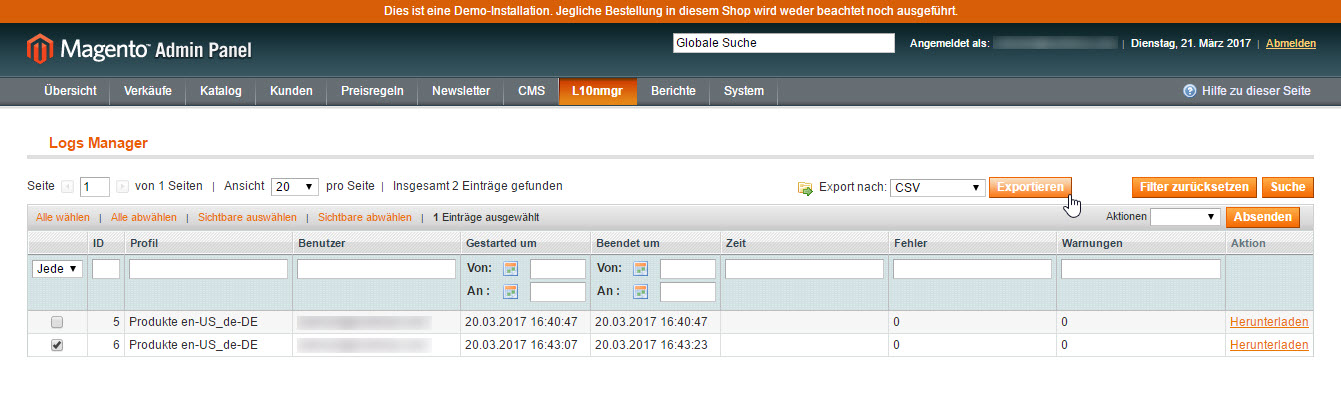
Logs can be filtered by ID, export profile, user, start and end date, time, errors and warnings.
Uninstall
To uninstall the Translation Manager, proceed as follows:
- Select the menu item System > Magento Connect > Magento Connect Manager.
- Enter your user name and password.
- Go to the section Manage Existing Extensions in the Magento Connect Manager and navigate to Locimize_L10nmgr in the list of extensions.

- Select Uninstall in the actions column of the drop-down list.
- Then click the Commit Changes button to start the uninstall process.
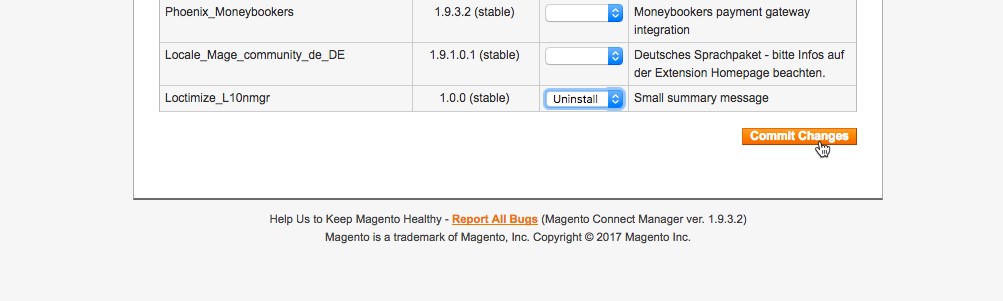
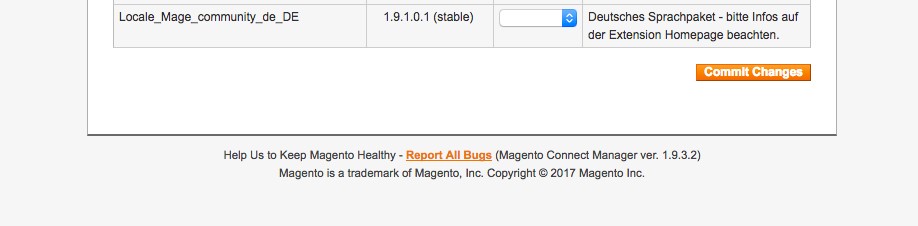
- After the uninstall process is completed successfully the Translation Manager is no longer displayed in the list of installed extensions.
FAQ
If a CMS page is assigned to multiple StoreViews (including the target StoreView), a translation cannot be imported. An error message is included in the log. Please rearrange before importing to solve this issue.
Attributes are managed centrally as they might be relevant for several products. They need to be exported and translated separately.
Help & Support
Do you have questions about the Magento Translation Manager or do you need support installing and setting up the Translation Manager? Contact us!

Loctimize GmbH
Daniel Zielinski
Försterstraße 19
66111 Saarbrücken
Germany
Phone: +49 681 91038365
Fax: +49 681 91038367
Email: support(at)loctimize.com